What IP authorization means
IP authorization is a method of allowing access to your proxies based on your public IP address. When your IP is authorized, requests coming from that source are automatically allowed without requiring credentials in each request.
InstantProxies supports both IP-based access and username/password authentication, giving you flexibility depending on how your environment is set up.
When users need IP authorization
You may choose IP authorization when you want a simpler setup without including credentials in every request.
This is commonly used when running scripts, automation, or applications from a known and stable environment. If your setup changes frequently or runs across multiple environments, username and password authentication may be more practical.
Understanding different IP types
Before authorizing an IP, it’s important to identify the correct one:
- Local Machine IP – Internal IP assigned within your network (not usable for authorization)
- Public Source IP – The external IP visible to the internet (this is what you need to authorize)
- Server or Cloud Egress IP – The outbound IP used by your server or cloud provider
Only the public or egress IP should be added to your allowlist.
How to find your public IP
Before authorizing access, determine the correct public IP of the environment you will be using.
You can do this by:
- Using an online IP checker
- Running a request from your server or application environment
- Checking your hosting or cloud provider’s outbound IP
Make sure the IP you retrieve matches the environment where your proxy requests will originate.
Step-by-step authorization flow
-
Log in to your InstantProxies dashboard
-
Navigate to the My Proxies section
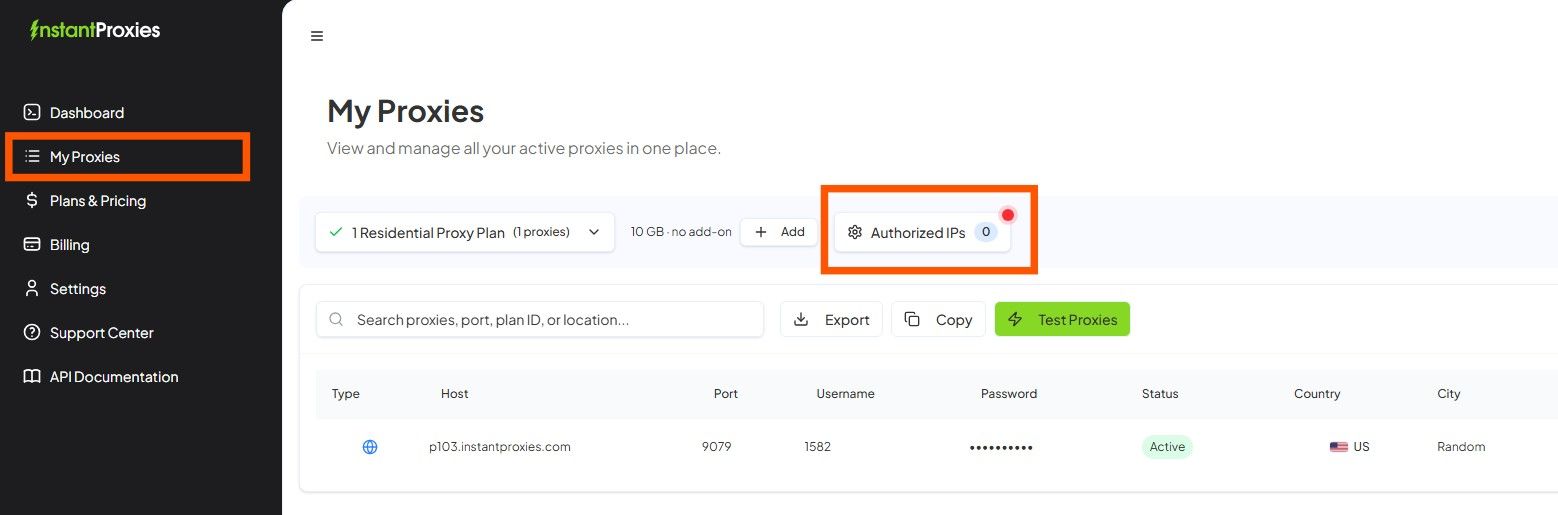
-
Click Authorized IPs
-
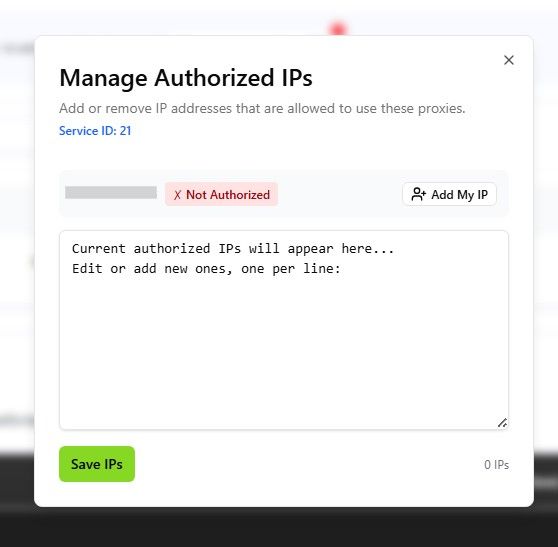
Enter your public or egress IP address
-
Click Save to apply the changes
Once saved, requests from this IP will be allowed without requiring username and password authentication.
How to confirm the IP was saved correctly
After adding your IP, verify that it appears in your authorized list within the dashboard.
Ensure that:
- The IP is entered correctly
- There are no formatting errors
- The changes have been successfully saved
A correctly saved IP should be visible immediately in your allowlist.
When IP authorization is the right choice
IP authorization works best in environments where the source IP remains consistent:
- A stable workstation with a fixed IP
- A server with a known egress IP
- A controlled environment where outbound IP does not change
If your IP changes frequently or your setup runs across different locations, using username and password authentication may be more reliable.
Common failure cases
Issues with IP authorization often come from incorrect assumptions about the source IP:
- Allowlisting the wrong machine or network
- Authorizing a local or private IP instead of the public IP
- Testing from a different environment than the one that was authorized
These mismatches can prevent successful proxy connections.
Verification steps after authorization
After authorizing your IP, test your setup to confirm that access is working:
- Send a request using your proxy without credentials
- Confirm that the connection is accepted
- If needed, test again using username and password to compare results
Successful access indicates that your authentication method is correctly configured.
Next step
After authorizing your IP, you can manage your allowlist or proceed with testing your setup. Continue to Managing Authorized IPs to update or review your allowed addresses, or move to Verify Your Connection to confirm that your proxies are working correctly. If you encounter issues, refer to Authentication and Allowlist Errors for troubleshooting.