Where the proxy list appears in the dashboard
Your proxy list is available directly within your InstantProxies dashboard. After logging in, navigate to the My Proxies section, where all assigned proxies for your active service are displayed.
This is the primary location where you will retrieve the proxy details needed for setup and testing.
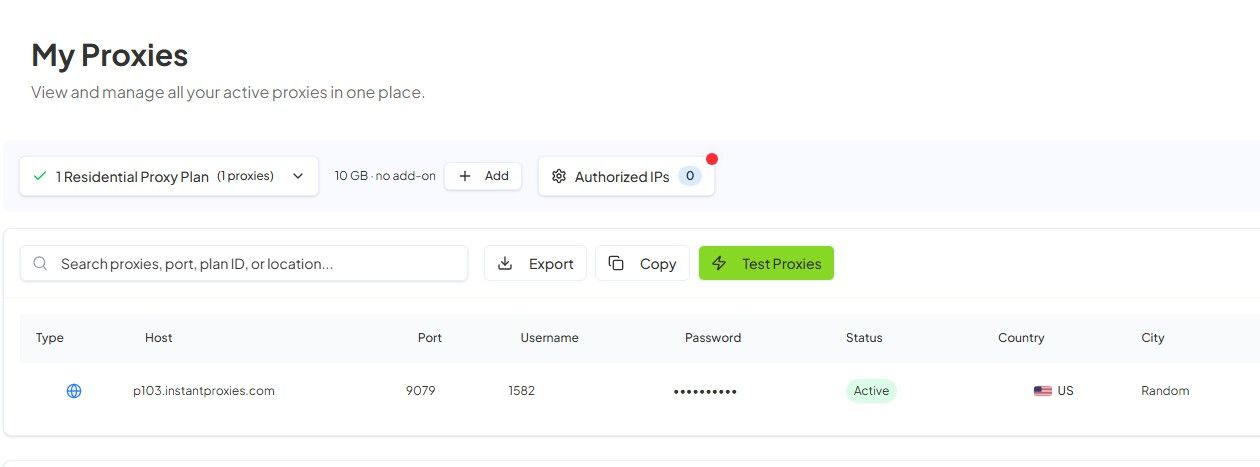
What a proxy entry includes
Each proxy entry contains the essential information required to connect:
- Proxy IP – The address used to route your connection
- Port – The access point paired with the IP
- Package or Allocation Context – Indicates which service or plan the proxy belongs to
- Authentication Method – Your proxies can be accessed using either username/password or IP-based authentication
These details work together to form a usable proxy endpoint.
How to choose one proxy entry for first testing
When starting out, select a single proxy from your list for initial testing. Any active proxy can be used, but it’s recommended to choose one entry and use it consistently during setup.
Make sure your selected proxy matches the authentication method you plan to use (username/password or IP-based access).
This helps you confirm that your configuration is working before expanding to multiple proxies.
Why first-time users should test one proxy only
Testing one proxy at a time allows you to isolate issues and verify your setup more efficiently.
Using multiple proxies too early can make it difficult to identify configuration errors, authentication issues, or network-related problems. Establishing a working baseline with one proxy ensures a smoother setup process.
How to copy proxy details safely and accurately
When copying proxy details from your dashboard, ensure that all values are transferred exactly as shown.
- Avoid adding extra spaces or characters
- Copy both the IP and port correctly
- Double-check formatting before pasting into your tool or script
Accurate input is critical for successful connections.
Understanding related formats and views
It’s important to distinguish between different representations of proxy data:
- Assigned Proxy List – Your actual working proxies shown in the dashboard
- Sample or Example Format – Reference formats used in guides or documentation
- Test Endpoints – Used for verifying connectivity and may vary depending on your authentication method
Only the assigned proxy list should be used for real connections.
What not to confuse with the proxy list
Several dashboard sections may look related but serve different purposes:
- Authentication Settings – Used to configure access (username/password or IP authorization), not to retrieve proxy endpoints
- Billing or Plan Information – Displays service details, not connection data
- Browser or testing tools – Helpful for validation, but not a source of assigned proxy endpoints
Always refer to the My Proxies section for actual proxy details.
Next step
Once you’ve located your proxy list, the next step is to configure how your proxies will be accessed and begin testing your setup. If you plan to use IP-based authentication, continue to Authorizing Your IP Address. If you’re ready to make your first request, proceed to First Request with cURL, then use Verify Your Connection to confirm that everything is working as expected.