Billing and pricing overview
Managing billing in InstantProxies should be straightforward. From the dashboard, you can review active services, monitor payments, and manage subscription-related actions from one place.
A clear billing view helps reduce confusion around active plans, transaction history, upgrades, cancellations, and support requests tied to account changes.
Accepted payment options
InstantProxies supports secure payment methods for account purchases and renewals.
Available options include:
- PayPal for account-based online payments
- Stripe for major credit and debit card payments
Payment handling is managed through external payment processors rather than directly through the documentation workflow.
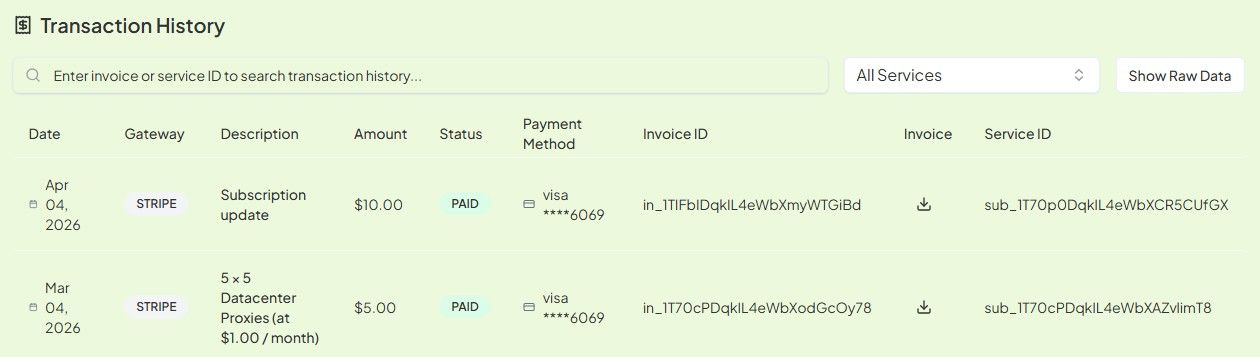
Invoices and payment activity
Your billing records are available from the dashboard so you can review current and past transactions.
Steps to view your transaction history
-
Log in to your InstantProxies dashboard.
-
Navigate to Billing > Transaction History.
-
Use this section to:
- search payments by Service ID
- review transaction history and payment methods used
- download invoices in PDF format for your records
If you need a general dashboard starting point first, continue to Dashboard Overview.
Upgrades and downgrades
If your proxy needs change, you may need to move to a different package or service level.
Typical upgrade or downgrade flow
- Contact support to request a package change.
- Review how the current service will be handled before the change is applied.
- Confirm whether any prorated credit applies to the remaining service period.
- Review the replacement package and the new invoice amount.
- Complete any required payment to activate the updated service.
- After activation, review your updated dashboard access and new proxy allocation.
Before requesting a billing change, it is a good idea to review your current service details and expected usage so the new package matches the real workload more closely.
If the change is driven by workload pressure or scaling needs, also review Understanding Current Limits.
Cancellations and refunds
Steps to cancel a plan
- Log in to your InstantProxies dashboard.
- Navigate to Billing > Active Subscriptions.
- Select the plan you want to cancel.
- Click Cancel.
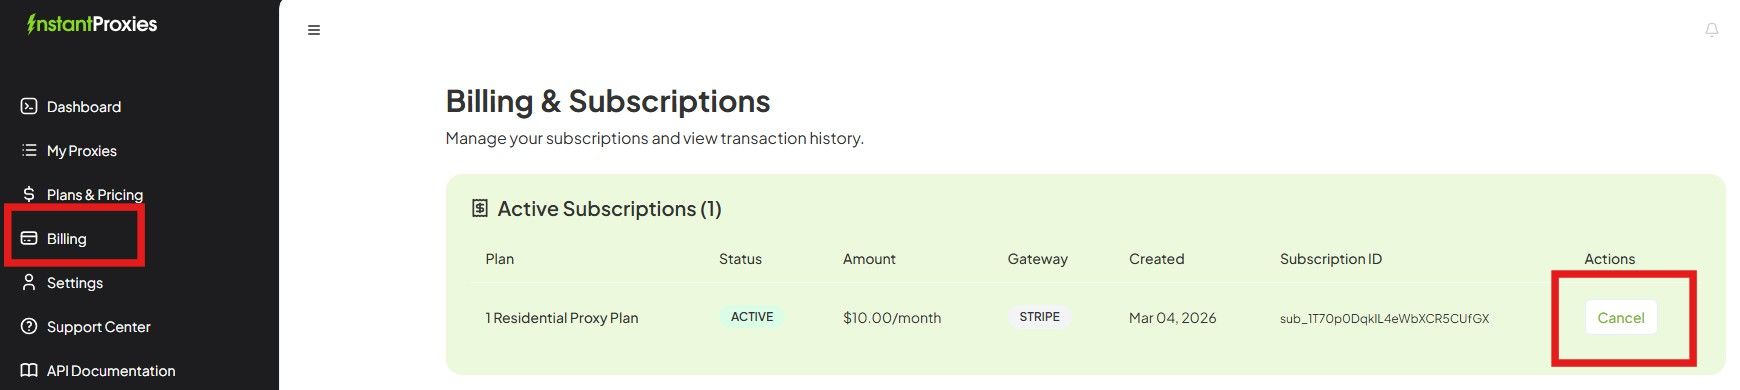
- Confirm the cancellation request.
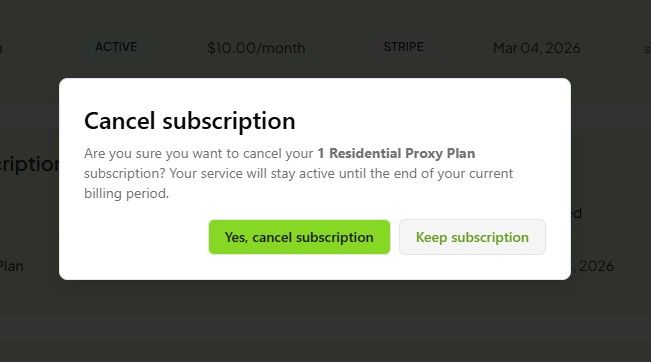
After cancellation, service may remain active until the end of the current billing period, depending on the subscription terms shown in the dashboard.
Refund policy
Refund handling depends on the current service terms and the specific account situation.
Examples that may require review by support include:
- the service does not work for the stated use case within the applicable evaluation window and no suitable replacement can be provided after review
- the service fails to meet the stated uptime or support expectations defined in the active policy
- a billing or support problem needs account-specific investigation
If you believe your case qualifies for billing review or refund consideration, submit the request through the dashboard support workflow.

Support for billing questions
If you need help with cancellations, invoice questions, subscription changes, or billing-related review, use the support tools available in the dashboard.
For general account navigation before opening a billing request, continue to Account Overview.