Microsoft Edge supports the use of proxy servers to enhance privacy, control location-based access, or assist in testing. Its proxy configuration is managed through the system settings, allowing the changes to apply across all browsing activity.
Set up a proxy in Edge (Windows)
Before starting, make sure your current environment is authorized if your setup uses IP allowlisting. If needed, start with Authorizing Your IP Address.
-
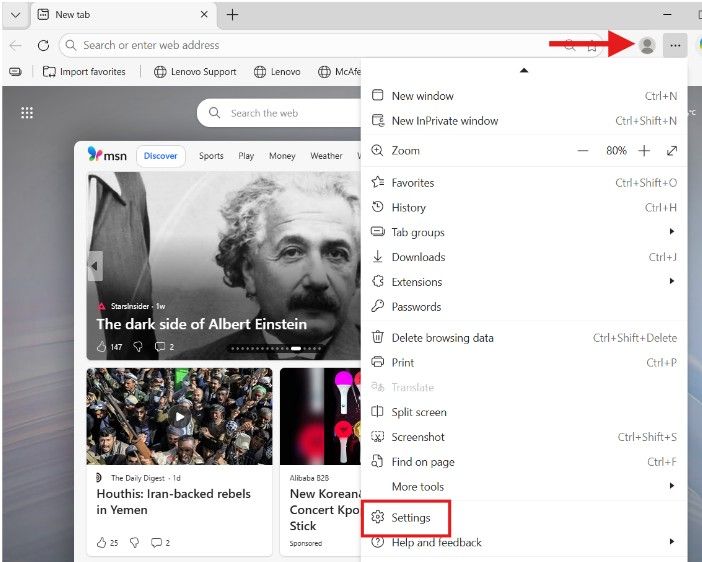
Launch Microsoft Edge on your computer. In the top-right corner, click the three-dot menu (•••), then choose Settings.
-
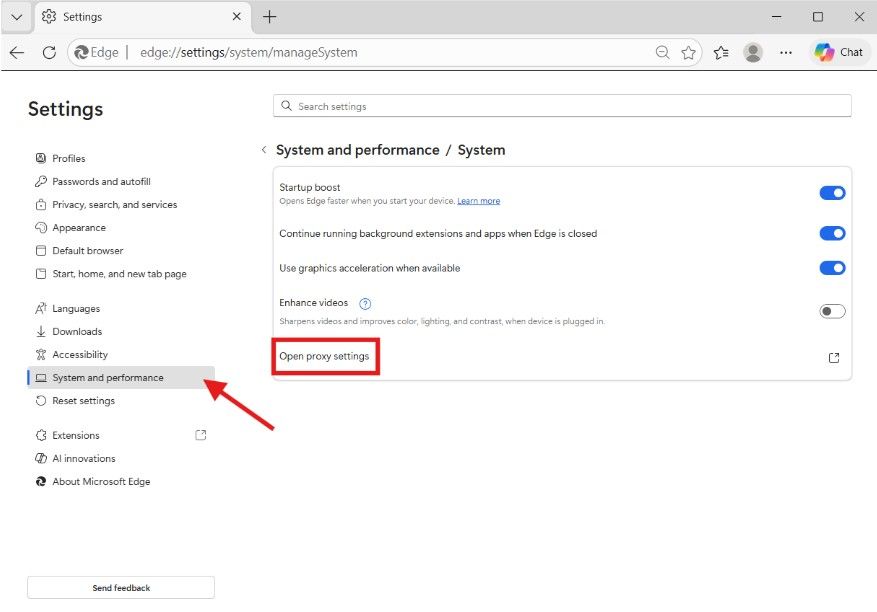
From the left-hand menu, click System and performance, then System, and choose Open proxy settings. This will bring up the Windows Proxy Settings panel.
-
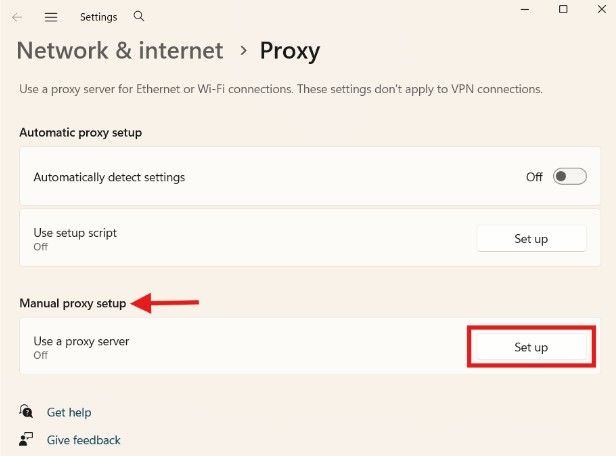
Within the new window, navigate to Manual proxy setup and click Set up to enable Use a proxy server.
-
Input the InstantProxies IP address into the Address field and specify the corresponding port number (e.g., 8800) in the Port field.
Optional: If you’d like some sites or local addresses to skip the proxy, add them to the Don’t use proxy server for addresses beginning with field (e.g., localhost;127.0.0.1).

-
Click Save to confirm the configuration. Edge will now route all browsing traffic through your InstantProxies IP.
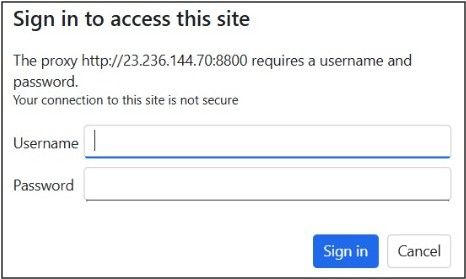
Note: When you access a website that requires proxy authentication, a pop-up may prompt you for your InstantProxies username and password. Enter your credentials to proceed.
Set up a proxy in Edge (macOS)
- Open Microsoft Edge on your Mac, go to the top-right corner, click the three-dot menu (•••), and choose Settings.
- From the left-hand menu, choose System and performance. Select System, then click Open your computer’s proxy settings.
- Tick the box for Web Proxy (HTTP) or Secure Web Proxy (HTTPS), depending on the type of proxy you’re using.
- Enable Web Proxy (HTTP) and/or Secure Web Proxy (HTTPS) depending on your setup. Then input the InstantProxies IP address and port number in the designated fields.
- If authentication is required, enable Proxy server requires password and fill in your InstantProxies login details.
- Click OK, then Apply to save your configuration. Your browsing traffic in Edge will now go through the InstantProxies IP.
Verify your proxy connection in Edge
After setting up your proxy, you can verify it’s working with these steps:
-
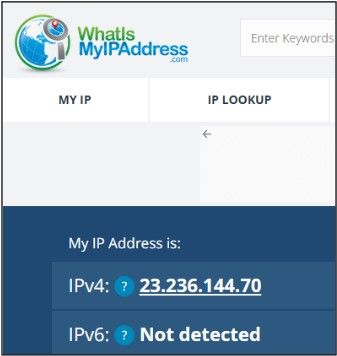
Open a new tab in Microsoft Edge and visit https://whatismyipaddress.com.
-
Check the IP address shown. If it matches your InstantProxies IP or reflects your proxy’s location, the setup is functioning properly.
Keep in mind: If your setup is expected to rotate or behave differently across sessions, the visible IP may change depending on the way the proxy is configured.
Next step
After Edge is configured, continue to Verify Your Connection to confirm that traffic is routing through the proxy path as expected. If you want the broader browser setup guides, continue to Platform and Browser Setup.