Using a proxy in Incogniton allows you to route each browser profile through a different IP address. This is useful for managing multiple sessions, improving isolation, and testing workflows across separate environments.
Set up proxy in Incogniton
Important: Before proceeding, ensure your IP address is authorized in your InstantProxies dashboard if you are using IP-based authentication. If needed, start with Authorizing Your IP Address.
-
Open Incogniton.
-
Create a new browser profile or edit an existing one.

-
Go to the Proxy Settings section.
-
Select HTTP proxy.
-
Enter your proxy details:
- Host (IP): your proxy IP
- Port: your proxy port
- If using username and password authentication, enter your credentials in the provided fields.
- If using IP-based authentication, leave the username and password fields empty.
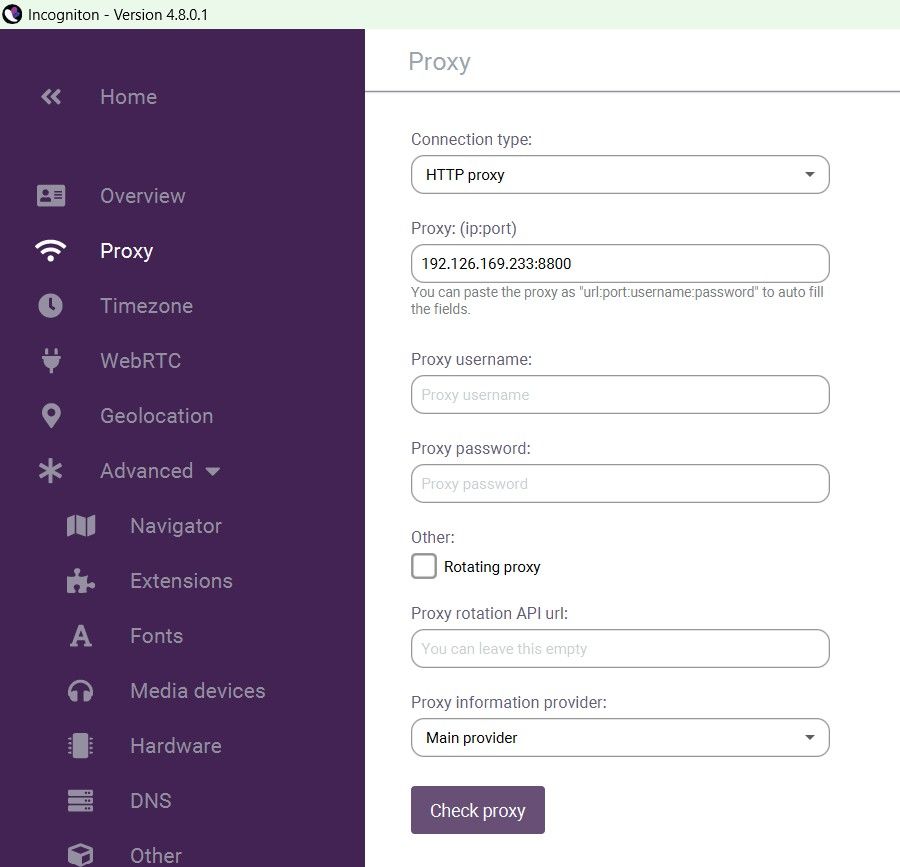
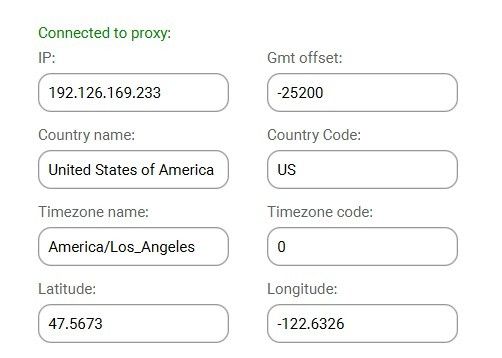
- Click Check Proxy.
- Confirm that the status shows Connected to proxy.
- Click Create Profile to save and apply the configuration.
Check proxy connection in Incogniton
-
Launch the browser profile by clicking Start.

-
Visit a site such as:
-
Check whether the displayed IP address matches your InstantProxies IP.

For a more direct validation step after setup, continue to Verify Your Connection.
Important note
Each Incogniton profile uses its own proxy configuration. Make sure the correct proxy is assigned to the specific profile you are using.
If the proxy does not work as expected, verify your proxy details, authentication method, and that your service is active in the dashboard.
If issues continue, use Connectivity Troubleshooting.